Tips and Printables
Find practical tips, printables and helpful articles to simplify and streamline your home.
Free Tips Below
Explore the free tips below to help you declutter and organise your home.
Less Mess. More Peace.
Free Decluttering and Organising Tips
Simple, practical ideas to help you create calm, clutter-free spaces at home.
Want more personalised help? Explore my Decluttering and Home Organisation Services, or view Prices and Packages to see what’s included in each session.
Many busy families and overwhelmed individuals struggle with clutter and disorganisation. If your home feels stressful, you’re not alone — and there are simple steps you can take today to start regaining control.
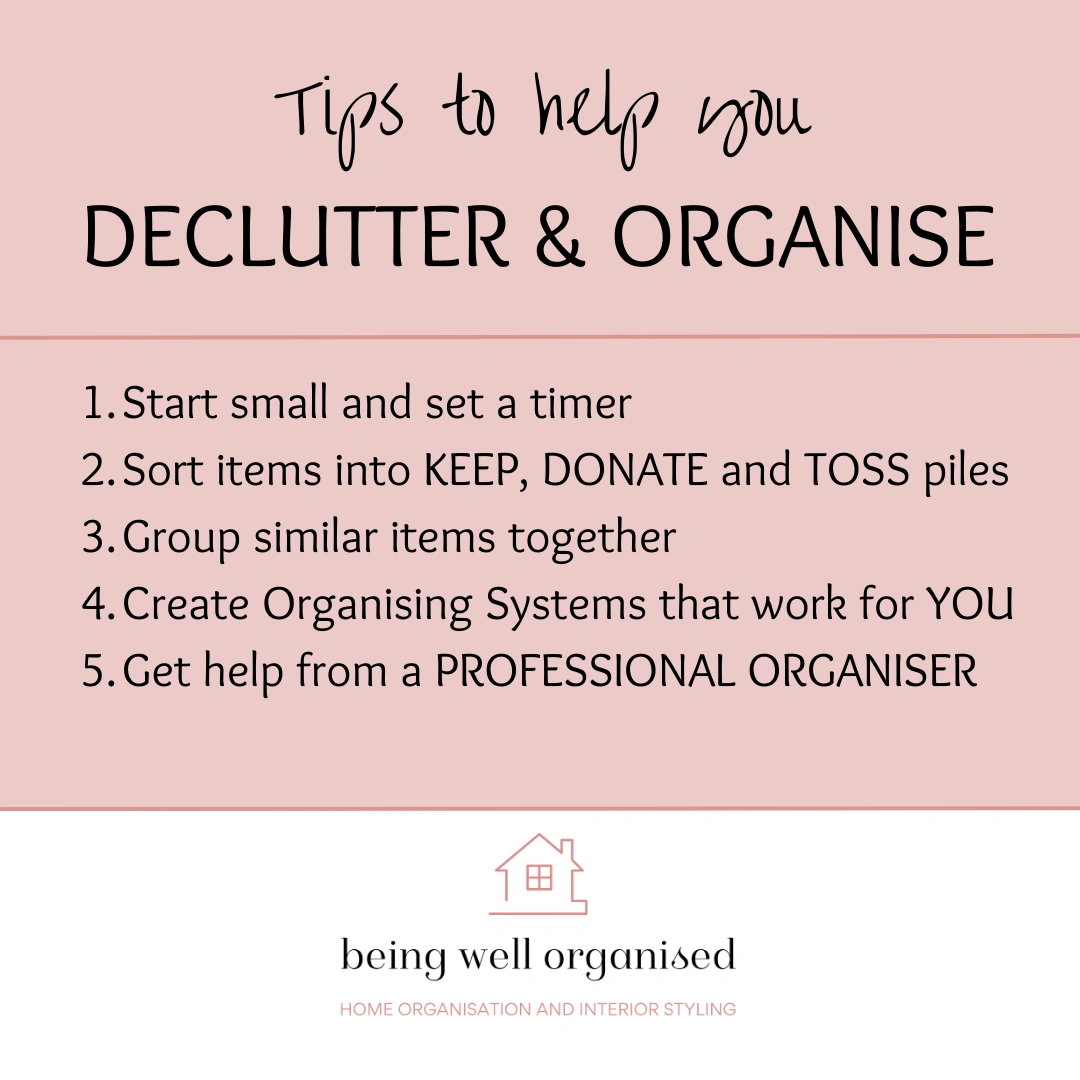
Here are 5 practical decluttering tips to help you get started:
1. Start Small and Set a Timer
Decluttering can feel overwhelming, especially when you’re busy or low on energy. Try focusing on one small area — like a kitchen drawer or a single shelf — and set a timer for 15 to 30 minutes. Breaking the task into manageable chunks makes it easier to begin and keeps you motivated.
2. Sort Items Into Keep, Donate, and Toss Piles
Be honest with yourself about what you really use and need. Toss out broken or expired items. Set aside things you no longer want but are in good condition to donate to charity. Sorting like this helps clear clutter quickly and makes the next steps easier.
3. Group Similar Items Together
One of the simplest ways to bring order to your space is by organising your belongings into clear categories. When similar items are stored together, it’s easier to find what you need—and just as easy to put things away.
Here are a few practical examples to get you started:
Kitchen Pantry: Keep all baking essentials in one area—think flour, sugar, baking powder, and shredded coconut.
Kids’ Room: Use separate tubs or bins for categories like soft toys, LEGO, and art supplies.
Grouping like with like not only makes your space more functional, it also cuts down on time spent searching—and tidying up becomes simpler too!
4. Create Organising Systems That Work for You
Your home organisation system should suit your lifestyle. Keep frequently used items within easy reach and consider clear containers or labels to make everything visible. The goal is to make your space easy to maintain daily.
5. Get Help from a Professional Home Organiser
If you’re downsizing, moving, or just feeling overwhelmed by clutter, a professional home organiser can provide personalised solutions tailored to your needs. I offer compassionate, practical support to simplify and style your home, making everyday life easier and more enjoyable.
Ready to Create a Calm, Clutter-Free Home?
If you live in Melbourne’s Eastern Suburbs and want to talk about simplifying your space, I’m here to help.
Contact me today for a free consultation and let’s make your home work better for you!
Decluttering sounds simple, right? Just toss out the stuff you don’t need, and voilà—a cleaner, calmer space! But if you’ve ever tried it and ended up overwhelmed, exhausted, or stuck in decision paralysis, you’re not alone.
The truth is, how you don’t declutter can be just as important as how you do it. Avoiding certain pitfalls can save you time, stress, and keep you motivated throughout the process.
Here’s a list of common how NOT to declutter mistakes—and what to do instead!
1. DON’T try to declutter the whole house at once
Trying to declutter the whole house in a single day sounds heroic but is a fast track to burnout.
Instead: Break your project into smaller zones. Focus on one drawer, closet, or room at a time. Celebrate the small wins to keep your momentum going.
2. DON’T start with sentimental items
Sentimental clutter can quickly derail your progress. You might find yourself stuck reminiscing instead of sorting.
Instead: Save sentimental items for last. By then, you’ll have decluttered the easier stuff and feel more confident making those tougher decisions.
3. DON’T set unrealistic expectations
Decluttering doesn’t mean a perfect home overnight. Expecting too much too soon can lead to frustration.
Instead: Set achievable goals for each session. Maybe 15 minutes a day or finishing one shelf. Progress, not perfection, is the goal.
4. DON’T hold onto “just in case” or “what if” items
It’s tempting to keep things “just in case” or “what if” you might need them someday. This often leads to clutter with items you don’t use, broken things, or duplicates.
Instead: Be honest with yourself—if it’s broken, hasn’t been used in over a year, and doesn’t have sentimental value, it’s probably time to let it go. When it comes to sentimental items, it’s okay to hold onto them a little longer, but also ask yourself if it might be time to let go and create space for what truly matters.
5. DON’T create a giant ‘declutter later’ pile
Creating a giant “declutter pile” without sorting can be overwhelming and discouraging, and it just delays the decisions to another time.
Instead: Use clearly labelled boxes or bags for “Donate,” “Recycle,” “Bin,” and “Keep.” This structure helps you stay organised and makes decision-making easier.
6. DON’T forget a plan for your donate/bin items
Decluttering only to leave bags of things to donate or discard piled near the doorway defeats the purpose.
Instead: Schedule donation drop-offs or rubbish pickups right after your declutter sessions. Having a plan prevents clutter from sneaking back in.
7. DON’T be too hard on yourself
Decluttering can be emotional and challenging. It’s okay if you can’t finish everything in one go or if you change your mind about an item.
Instead: Practice self-compassion. Celebrate every bit of progress, and remember: organising is a journey, not a race.
8. DON’T think you have to do this all alone.
Call in help when you need it! It’s perfectly normal reach out for support.
Even small steps with a professional organiser can bring clarity and motivation. If you’d like some guidance tailored to your space and lifestyle, don’t hesitate to get in touch. I am here to support you at your pace—whether it’s a mini session, your choice of 3- or 4-hour sessions booked as you go, or a full refresh package.
Avoiding these common mistakes can make your decluttering experience smoother, and remember that I am just a message away if you need more tailored support.
Ready to organise your bathroom without dread? A few simple tweaks can make a difference. Here’s some simple steps that work.
Start small Pick one drawer, shelf or cupboard. You don’t need to tackle the whole bathroom in one go. Choose one area to start with and stay focused — avoiding overwhelm is key to making progress that lasts.
Toss anything expired or broken There’s no reason to hang onto these. Old skincare, dried-out nail polish, stretched hair ties, makeup past its best, broken clips or tools — if it’s not useful, it’s just taking up space.
Clean the space A fresh surface helps reset your mindset. Wipe everything down before putting anything back — it instantly lifts the space and makes it feel more organised, even before you're finished.
Sort by category (face, body, hair, tools, etc) You’ll find things faster and spot duplicates. Group similar items together and notice what you have too much of (five half-used body lotions?). Daily use items should be easy to grab without rummaging.
Contain your items Use bins or baskets – if it’s full, stop adding! Containers help give structure and make it easier to return things to the right place. Keep it simple and functional — no need to overcomplicate.
Store extras separately Keep your main space for items in use, but have some backup (so you don’t run out mid-wash!). A small box or basket on a shelf or cupboard works well for surplus items. It can even be in another room like your wardrobe or linen cupboard.
Clear your vanity Less on the surface = calmer mornings. Keep out only what you use daily. Storing the rest in drawers or containers clears mental clutter and sets a calm tone to start and end the day.
Use vertical space Hooks, shelves, and over-the-door racks are game-changers. Especially useful in small bathrooms — think upwards to create storage where there was none before. Great for towels, hair tools, or even baskets.
Small systems = lasting results You don’t need a makeover — just a few tweaks to make your space work better for you. Start today and thank yourself tomorrow!
Your entryway sets the tone for your entire home — it’s the first space you see when you walk in and the last when you leave. Keeping it organised doesn’t just make it look good; it helps you start and end your day with calm and ease. Here are a few simple, thoughtful tips to create an entryway that feels both functional and inviting.
Define the space Even if you don’t have a separate hallway, you can create the feeling of an entryway. Use a hall runner or rug, small bench, shoe rack, hooks or a console table to visually define the area. This helps give everything a place and prevents shoes, bags, and keys from spilling into the rest of your home.
Think vertical Maximise wall space with hooks, shelving, or a peg rail. Hanging coats, hats, and bags keeps surfaces clear and makes it easy to grab what you need on the way out. Consider adding a slim wall-mounted shelf, small tray on a table as a mail drop zone for post and other small essentials.
Incorporate hidden storage A bench with built-in storage, woven baskets, or drawers can hide everyday clutter while keeping necessities within reach. Use baskets or individual tubs for each family member to make staying organised effortless. Keep shoes neatly stored beneath the bench or table to maintain a tidy look.
Create a drop zone Dedicate one small area — a tray, bowl, or drawer — for keys, wallets, and sunglasses. This simple habit prevents those daily “where did I put it?” moments. For school or work bags, use hooks or labelled baskets that hold everything you need per person while keeping the area clutter-free.
Add warmth and personality Style your entryway with a mirror, artwork, or some greenery. It makes the space feel finished and welcoming, while a mirror doubles as a quick last-look spot before you leave.
A well-organised entryway doesn’t have to be large — it just needs thoughtful design. With a few smart storage solutions and a touch of personal style, you can turn even the smallest entrance into a calm, clutter-free Welcome Home.
Having a well-organised first aid kit at home is essential for being prepared for any minor emergencies that may arise. With many years of nursing behind me, I understand just how important it is to have quick access to the right supplies — and to know how to use them properly.
If you haven’t checked your first aid kit lately, now is the perfect time to give it some attention. Here are my top tips to keep your kit practical, accessible, and safe for your household:
Sort and Declutter
First things first: go through your kit and remove any expired medications, used items, or anything that’s no longer safe to use. Keeping expired products can be dangerous and ineffective in emergencies.
Group Similar Items Together
Organise your supplies by category. Keep bandages, antiseptics, medications, and tapes in separate compartments or containers. This way, you can find exactly what you need without fumbling around when time is of the essence.
Labels Matter
Make sure all labels are clear and easy to read. With medications, it’s important to check that nothing has faded or become unreadable over time. Clear labels help prevent mistakes.
Store in a Dry, Cool Place
Many people store their first aid kits in the bathroom, but the humidity there can damage medicines and supplies. Instead, choose a dry, cool spot in your home — like a cupboard away from heat sources — to keep your kit safe.
Keep Out of Reach of Children
Safety always comes first. Make sure your first aid kit is stored in a location where children cannot easily access it, to prevent accidental ingestion or misuse.
Know How to Use Each Item
Having a well-stocked first aid kit is only helpful if you know how to use the items inside. Take the time to familiarise yourself with the contents and their proper use. Consider keeping a first aid manual or quick reference guide in your kit for emergencies.
Consider Making Your Own First Aid Kit
While pre-made kits can be convenient, they’re often packed with items you may never use — or missing essentials you actually need. Building your own kit allows you to tailor it to your household’s unique needs.
And the best part is that it is customised! Start with the basics (bandages, bandaids, antiseptic, gauze, tweezers, adhesive tape, antihistamines, pain relief you regularly use, children's medications etc…) then build out based on your family's activities, medical conditions, and age groups.
Why a Well-Organised First Aid Kit Matters
A neat and organised first aid kit means less stress and faster action. Whether it’s a small cut or a more serious injury, having the right supplies at hand — and knowing how to use them — can make all the difference.
As a professional organiser with a nursing background, I combine practical knowledge with organisation skills to create systems that work for you.
If you’d like help organising your home to be safer, more efficient, and ready for anything, I’m here to help.
If you’ve ever gone digging through your freezer and discovered a mystery container from who-knows-when, you’re not alone. Freezers can easily become a jumble of leftovers, bulk buys, and “just in case” meals. The good news? A little time spent sorting can make your freezer work smarter for you. Whether you’re doing a seasonal clear-out or just trying to stay on top of the chaos, these easy freezer organisation tips will help you reclaim your cold storage space and keep it that way.
1. Remove Everything One Section at a Time
Instead of emptying the entire freezer (and watching your food start to thaw), tackle it one shelf, drawer, or section at a time. This makes the process less overwhelming and helps you stay focused on organising efficiently.
2. Toss the Unwanted or Unusable
Be ruthless here. Anything expired, freezer-burned, or long forgotten should go. If you haven’t eaten it by now, you probably never will. Clearing out old items makes space for food you’ll actually enjoy – and a tidy freezer makes planning meals easier too.
3. Group Similar Items Together
Once you’ve decluttered, sort what’s left into categories. For example; ice creams and desserts together, veggies in one spot, and ready meals in another. When everything has a place, you’ll spend less time rummaging and more time cooking.
4. Keep or Decant—But Always Label!
You can store food in its original packaging or decant into freezer bags or containers to save space—but the key is labelling. Always note what it is and when it was frozen. A simple label system eliminates the guesswork of “mystery meals” and helps you track freshness.
5. Don’t Overstuff
It’s tempting to fill every bit of space, but a little breathing room actually helps your freezer work more efficiently. Leave space for air to circulate so food freezes evenly and your freezer doesn’t have to work overtime.
6. Freeze in Portion Sizes
Before freezing leftovers or bulk buys, divide them into portions. This way, you only defrost what you need, saving both time and food. It’s especially handy for busy families when everyone’s eating at different times - think sports, music practice, running late from work...
With just a little effort, your freezer can go from chaotic to calm—and stay that way. A tidy, well-organised freezer makes meal planning easier, reduces waste, and turns your frozen food stash into something you’ll actually use and enjoy.
Focus on one section at a time.
Discard all expired items.
This include leftovers that won’t be eaten and have passed their time.
Don’t forget the fruit and veg that were purchased with good intentions but have now sat in the fridge too long….
Food should be stored in the appropriate section of the fridge.
Some general layout ideas:
Upper shelves – leftovers, ready to eat, snacks
Middle shelves – dairy, eggs, deli
Lower shelves/Crisper – fruits and veg, meats and fish
Fridge Door – condiments, drinks
Tweak the sections of your fridge, using the layout as a guide.
Ultimately, your fridge needs to suit and be functional for YOU.
You can decant, place on trays or in tubs.
Labelling makes it easier for everyone!
1. Empty It Out Completely
Start by taking everything out of your bag and laying it all out on a flat surface. Seeing all the contents at once helps you understand exactly what you’re carrying around every day — and what you really don’t need! Group items into categories like essentials, non-essentials, and trash.
2. Toss the Rubbish
Most of us discover that our handbag (and purse) contains receipts from months ago, old shopping lists, empty wrappers, or other bits of rubbish that have managed to find their way into our bag. Throw all rubbish out – this lightens the load immediately.
3. Organise by Category
Once you’ve cleared out the clutter, group similar items together. For example, keep all your makeup in one small pouch, tech accessories like chargers and earbuds in another, and medications or first aid items in a third. Using small bags (like pencil cases or makeup bags) inside your handbag keeps everything neat and easy to find.
4. Keep Only What You Really Need
Be honest with yourself: do you need three lip balms, six pens, or two notebooks in your bag? Make a decision to ONLY carry the essentials that you use daily. Less clutter means less stress and more space for what matters.
5. Do a Weekly Reset
Make a habit of quickly checking your handbag once a week to remove anything that’s accumulated. This simple routine takes just a couple of minutes and prevents clutter from building up again.
Bonus Tip: Use a Bag Organiser Insert
If you tend to switch between bags or your handbag doesn’t have compartments, consider investing in a bag organiser insert. These handy organisers create built-in sections, making it easy to keep everything in its place. Even just using a few small pouches can make a big difference, especially when you swap bags regularly.
A tidy handbag isn’t just about looks — it helps you feel more organised, less stressed, and ready to tackle your day. Try these simple tips today and see how much difference a little organisation can make.
Set a timer for 30mins if you are short on time (or energy).
Focus on a small area such a single shelf.
Decluttering is less overwhelming if you can break it into smaller chunks of time.
Discard expired items.
Everyone has something that expired in their pantry! Many people find all sorts of things hiding in the back.
Remove anything that is broken or things you just don’t use.
Broken items/containers can be discarded.
Things you just don’t use, but are still in good condition can be set aside for donation.
Get rid of impractical storage containers.
Whatever you decide to use it should comfortably fit in the space you have, be accessible and visible so you can easily see what you have.
Combine multiples or double-ups together.
If you have multiple open packets of pasta, biscuits etc... Combine them. You can decant into containers, or even keep in original packaging in a basket.
Whatever method you like, they should be together.
Categorise remaining items into groups.
For example, all cereals together, a baking section...
Grouping like items improves the function of your pantry and can help reduce wastage (as you can easily see and use what you have).
Organise in a way that is functional for how you use it.
Your systems are just that = YOURS. They need to suit you and be easy to maintain.
And lastly, labelling makes it easier for everyone!
Decanting pantry items—transferring foods from their original packaging into uniform containers—can make your kitchen look tidy and functional. I love decanting pantry staples, but it isn’t for everyone, and that’s perfectly okay.
When to Decant: Items you use frequently, like flour, sugar, rice, pasta, and cereals, benefit from clear, airtight containers. They keep foods fresh, make ingredients easy to access, and allow you to see what’s inside at a glance. Containers also stack neatly and create a visually cohesive pantry. You can even personalize your space with the style of labels you prefer!
When Not to Decant: Decanting isn’t for everyone—opening every package and pouring it into a new container can feel like extra work. If this stresses you out, stick with original packaging, perhaps clipped or stored together in a labelled tub. Think carefully before decanting pre-packaged sauces, condiments, or juice—most of the time it’s just unnecessary. Cake or pancake mixes with instructions, or single-serve snacks, can also be tricky and may lead to confusion or spoilage.
Pro Tips:
Label every container clearly. Broad categories like “Nuts” are fine, but specifics matter for items that look alike, like “Plain flour” vs. “Self-raising flour”.
Choose containers that fit your shelves and are easy to open.
Consider washing up—dishwasher-safe containers save time unless you love handwashing!
Decanting should make your life easier, not more complicated. A balanced approach—mixing decanted staples with select original packaging—often creates the most functional, stress-free pantry.
Whichever method you choose, it should suit YOU.
And, if you ever need some hands-on help – call in a professional organiser for helpful tips and ideas that suit YOUR space!
The area under the kitchen sink can easily become a messy catch-all — it’s often awkwardly shaped with pipes, and things tend to just get thrown in there.
Here’s how to make it work for you:
Declutter first. Take everything out and toss anything that’s expired, leaking, or almost empty (and let’s be honest, never getting used). You might be surprised at what’s lurking at the back!
Review your space. The under-sink area can be tricky with pipes and plumbing, so think beyond just using the base surface. Use the back of the cupboard doors, sides of the cabinet, and don’t forget vertical space — stacking can be a game changer.
Group like items. Keep all your cleaning products together, dishcloths in one spot, and dishwasher tablets/liquid corralled. Grouping items into categories makes things easier to find and put away.
Use smart storage solutions. Consider shelf risers, pull-out drawers, or tubs to contain items. This helps keep things tidy and prevents them from getting lost in the back.
Make everyday items easy to grab. Keep your most-used items visible and at the front — this way you're not always digging through everything just to find the dish soap!
Label where it helps. Labels are especially useful if you’re sharing the space with others, and even to remind you where to put things back. Clear labelling makes it easier for everyone to keep things in their place.
This is a small but mighty space — organising it can make everyday tasks quicker and less frustrating!
Choose one area to focus on if you are short on time (or just cannot face the whole laundry!)
Under sink, cupboards, broom cupboard, drawer, benchtop.
Clear the benchtop and only keep the items you use every day visible.
Discard any rubbish.
Everything else (that you are going to keep) will find a place in a cupboard or drawer.
Sort through detergents and cleaning products and discard anything expired or you just don’t use. We can all get by with far less products than we think we need.
Everything you keep in the laundry should earn its place. If it is multipurpose, even better!
Check your brushes, buckets, brooms and discard anything that is broken.
Broken bucket handles? Wobbly broom that comes apart? Brush that drops bristles?
Don’t remain frustrated in your cleaning efforts because of broken or damaged tools.
Replace them when broken so the job is done more efficiently and without irritation!
Put the remaining items together in categories.
Whatever products you use, keep the same things together.
As you are decluttering, keep a list of the items that will need to be restocked, so next time you are shopping, you won’t wonder what it was that you needed!
Take one shelf at a time (if you cannot face the whole cupboard!)
Remove EVERYTHING, yes really
Discard what you don’t use or is no longer fit for purpose.
I’m talking about tears and rips, wonky elastic, stains that are never going to come out, threadbare towels, or even sheets that fit beds you no longer have.
If you have kids who have outgrown their My Little Pony or Batman sheet sets, consider donating to younger cousins (who, in my experience, LOVE to receive these from their “big cousins”) or send to the op shop.
Arrange each shelf with categories.
Towels, handtowels, facewashers and bathmats sorted into sets or by type.
Sheets and pillowcases sorted by size, or you can put a whole bed set together. Whatever works best for you!
Doona covers and pillowcase sets
Doonas (winter and summer if that’s your thing) and extra pillows
Extra blankets – sort by size
Folding methods
Towels folded in rectangles, or squares, or rolled, or ends tucked in
Sheets placed together in their sets inside the pillowcase, or folded separately?
What about the dreaded fitted sheet, folded neatly (I can show you in person, or there are instructions on YouTube!) or scrunched up?
No one way is better than another. Find a folding method which is functional and easy for you and the family to do. This will be the easiest to maintain.
Use labelled baskets/tubs if you have the space, OR label sections on the shelf and place items directly back
The final touch Soaps or fragrance sachets help keep everything smelling fresh
A tidy and functional linen cupboard can help save time, reduce stress and make everyday tasks easier!
If you are not sure where to start and would like to book in an in-home consultation, (including showing you how to neatly fold a fitted sheet!) I can show you more ideas that suit your own linen cupboard.
The Kids’ Playroom is a space that should look fun, encourage creative play and imagination, but NOT stress the parents out with all the mess! Here are some tips to help declutter and keep this room in check, whilst providing lots of room and fun for the kids, with minimal stress for Mum and Dad!!
Set a timer for however long you think you can manage! Focus on a small area, like a single shelf or toy bin. Breaking it into manageable chunks makes decluttering much less overwhelming.
Involve the kids (age-appropriate) Let children help with sorting and choosing what to keep or donate. For younger kids, turn it into a game. Start with obvious broken or less favoured toys first. Older kids can help decide what to pass on. These ‘easier’ decisions can help start the process and get things moving.
Set up tubs or bags labelled with “Donate”, ”Bin” and “Unsure” (Note: set aside a space for “Keep” and follow the Tips for Organising your Kids’ Playroom)
Every toy goes into the chosen section. Be honest—if a toy hasn’t been played with in the last year or your kids have outgrown it, it’s probably ready to pass on to younger cousins, friends, or a local op shop.
Sometimes kids (or parents!) can’t decide in the moment, so a small temporary box that you check again in 1–2 months can prevent decision paralysis. Then, if no one asks for the item, it’s ready to go.
Sort items by type and combine duplicates Gather all toys of the same type together—puzzles, blocks, dolls, art supplies, etc. This makes it easier to spot duplicates and see what’s really being used. Discard or donate any unwanted duplicates.
Contain items by category Limit what you keep to an agreed-upon size or ‘container’. Once the container is full, that’s it! This is a good visual boundary, especially for kids.
Schedule regular mini-decluttering sessions. Decluttering isn’t a one-time job. Quick checks every few weeks or months help remove broken or unused toys and keep the playroom functional and inviting. Remember to involve the kids in these sessions—it reinforces responsibility and makes the task quicker.
And, if you ever need some hands-on help – call in a professional organiser for helpful tips and ideas that suit YOUR space!
A well-organised playroom helps children play more independently and makes pack-up time much less stressful.
Before you can organise the playroom – you should take some time to declutter first. This will make the whole process smoother and easier to manage. (Note: follow the Tips for Decluttering your Kids’ Playroom)
Maximise storage Use shelves, tubs, cubbies, wall organisers, or under-bed bins to make the most of your space. Give everything a “home”. Every toy and item should have a designated place where it belongs. This makes it easier for kids (and adults!) to know where things go when it’s time to tidy up. For everyday play items – consider using open storage for easy access. If it’s easy to grab, it’s more likely to be used—and put away. Boxes with lids can be used for less used items to help reduce visual clutter.
Create zones for different activities Divide the playroom into simple zones—such as a reading corner, building area, craft station, or imaginative play space. Zones help guide play, contain mess, and make tidying up easier.
Label everything Labels (words or pictures) help kids know exactly where things belong and encourage independence when packing away. Clear tubs, baskets, or containers also make it easy to see what’s inside without pulling everything out.
Prioritise accessibility Keep frequently used toys at child-eye level so kids can reach and return them independently. Store less-used items higher up or in opaque bins. Clear, labelled containers—or picture labels for younger children—work especially well.
Think about how best to rotate toys Instead of keeping every toy out at once, try a rotation system. Keep a selection accessible and store the rest. Rotating toys keeps playtime fresh and helps reduce clutter.
Make pack-up part of the routine Set a regular tidy-up time each day (or after each play session). Using a timer, music, or a quick game can make it more fun and help build consistent habits.
Keep surfaces as clear as possible Avoid overcrowding shelves or floors. A little empty space makes the room feel calmer and gives kids more room to play and be creative.
Review and adjust as needed As your children grow, their needs and interests change. Revisit your setup every so often and tweak the system so it continues to work for your family.
Remember—organisation doesn’t have to be perfect. Simple, practical systems that your family can stick to will always work best!
And, if you ever need some hands-on help – call in a professional organiser for helpful tips and ideas that suit YOUR space!
Decluttering sentimental items is often the toughest part of organising. These objects carry memories, emotions, and connections to the past, making it hard to let go. To avoid feeling overwhelmed, it’s important to approach them thoughtfully—and not rush the process.
Don’t Start with Sentimental Items Sentimental items can be emotionally heavy. Start your decluttering journey with easier categories, like the kitchen pantry, or linen cupboard. Once you’ve built momentum and confidence, you’ll be better equipped to tackle the items that tug at your heartstrings.
Set a Clear Goal Before you start, define your purpose. Are you decluttering to create a calmer home, prepare for a move, or reclaim your space? Knowing your “why” will guide your decisions and help you let go of items with intention, rather than guilt.
Set a Space or Container Limit Decide in advance how much space you are willing to dedicate to sentimental items—a single box, drawer, or small cupboard. This ensures intentionality: once your container is full, that’s it. You cannot keep adding items endlessly, which helps prevent clutter from creeping back in.
Set a Session Time Limit Decide in advance how much time you’ll dedicate to decluttering sentimental items per session. Be kind to yourself—sometimes you may need to take a break or tackle a less emotional task, and that’s perfectly OK.
Ask Yourself the Right Questions When considering whether to keep an item, ask:
Does this truly represent a cherished memory?
Does it bring me joy now?
Could I preserve the memory in another way, like a photo or digital copy?
Am I keeping this out of guilt or obligation?
Was this handed down to me, but I don’t like it or will never use it?
If the answer is yes to the first two, keep it. If your attachment is based on guilt, obligation, or simply because it was passed down, it may be time to let it go.
Honour the Memories, Not the Things Sometimes the value of an item is the memory it holds, not the object itself. Taking photos, creating a scrapbook, or journaling about the memory can preserve it without keeping every physical item.
Keep Only What You Cannot Let Go Sentimental decluttering isn’t about discarding your past—it’s about curating it. Only keep the items that truly matter to you. Trust your instincts and your emotions. If an item sparks a strong connection you cannot part with, it belongs in your keepsake box.
Remember to Take Your Time Decluttering sentimental items is not a race. Work in small sessions, give yourself breaks, and be gentle with your emotions. The goal is a space that feels lighter, more organised, and intentional.
If you need some extra support, consider booking in a professional organiser. I can help you work at a pace that suits you, acknowledging the many years of belongings that you are sorting through, and guiding you to make decisions that feel right for you.
By approaching sentimental decluttering with rules, boundaries, and compassion, you can honour your memories while creating a home that suits you right now—calm, organised, and joyful.
Set up bags or tubs into BIN, DONATE, MEND. If you don’t have enough baskets or tubs, just allocate separate spaces on your bed or floor.
Remove unused coat hangers. This creates more space in your wardrobe. Unused coat hangers can be returned to your wardrobe if you have space when everything has been organised, OR you can locate them elsewhere.
Discard items that don’t fit, you will never wear or are no longer your style. Use the bins you set up at the start to sort these items.
Sort the items you will keep. Group similar items together by colour or type. I like to use an over-the-door hook, which makes it easy to see and sort clothing as I go.
Be realistic about your lifestyle. If you work from home most days, do you really need five business outfits? Keep the clothing that supports your current life.
Return items to your wardrobe in a way that makes sense to you — by colour, type, season or occasion. The best system is the one you can maintain.
Remember that your wardrobe is just that — yours. It doesn't need to look like a magazine. It simply needs to function well and make getting dressed easier, saving you time and effort.
Need a helping hand? If your wardrobe feels overwhelming or you're struggling to know where to start, professional organising support can make the process faster, easier and far less stressful.
When Being Well Organised works alongside you, you'll also benefit from personalised strategies and practical solutions tailored to your space, lifestyle and goals.
If you're on a decluttering or organising journey, here are some simple, practical, and very do-able tips to help reduce waste going to landfill, see the potential in repurposing items and promote sustainability.
REDUCE Start by being a bit more intentional about what comes into your home:
Ask yourself — Do I really need it? Do I already have something similar?
Avoid impulse buys (yes, even that storage basket calling your name at Kmart!)
Go digital with paperwork where you can — less clutter and less paper.
REUSE Give things a second life:
Glass jars, tubs, shoeboxes or baskets you already have can become great storage for all sorts of bits and pieces.
Hand-me-downs for kids' books or toys — let’s be honest, younger cousins LOVE getting things from the “big kids.”
RECYCLE Not everything needs to go to landfill:
Clothes you no longer wear? Donate them to someone who will.
Keep a “donate” box in a cupboard or garage — when it’s full, pop it straight in the car boot so it’s ready to drop off.
Label your bins clearly so everyone at home knows where things go (especially teens!)
And remember: it doesn’t have to be perfect.
The goal is progress, not perfection.
Helpful Articles
Many people have heard the term "professional organiser" but are unsure what the service involves. Does it include decluttering? Organising? Or both?
A professional organiser works alongside you to create functional, manageable spaces that support your lifestyle. The goal is not perfection, but to create systems that work for you and your household.
Every client and every home is different, so the support provided will vary depending on individual goals and circumstances.
Professional organisers commonly assist with:
General home decluttering and organising
Sorting and categorising belongings
Deciding what to keep, donate or discard
Creating practical storage solutions
Organising specific areas such as kitchens, pantries, wardrobes, home offices and garages
Helping clients feel less overwhelmed by clutter
Establishing routines and systems that are easier to maintain
Supporting major life transitions such as moving house, downsizing, welcoming a new baby or managing the belongings of a loved one.
Professional organisers vary in their areas of expertise. Some specialise in particular areas, such as wardrobes or kitchens, moving house, digital organisation, or working with specific client groups.
Being Well Organised provides support across all areas of the home. Whether you need help organising a wardrobe, pantry, kitchen, laundry or multiple rooms, the goal is always the same — to create practical systems that make everyday life easier. You can learn more about the services I offer on my Services page.
A professional organiser does not simply tidy your home. They help you make decisions about your belongings and create practical systems that are easier to maintain over time.
Many people assume they need to tidy up before contacting a professional organiser. In reality, most clients seek support because they feel overwhelmed, don't know where to start, or simply want an experienced and objective person to guide the process.
Professional organising is not about creating a picture-perfect home. It is about creating practical, personalised solutions that work for the people who live there. Many clients seek help because they are time-poor, feeling stressed by clutter, or struggling to find the time and energy to tackle a project on their own.
The process is collaborative, practical and tailored to each person's circumstances. Some clients need help with a single area such as a wardrobe or pantry, while others require support across multiple rooms or larger life transitions such as downsizing.
If you are wondering whether professional organising could help in your situation, consider giving me a call. We can discuss your goals, answer any questions and explore the most effective way to move forward.
Less Mess. More Peace.
Many people have heard of decluttering services but are unsure what they actually involve. Will someone tell you what to get rid of? Will your belongings be thrown away? How does the process work?
Decluttering services are designed to help you reduce excess belongings, create more functional spaces and make your home easier to manage. Every client and every home is different, so the process is tailored to individual goals, circumstances and comfort levels.
One of the most important things to understand is that home organising projects always start with decluttering. You cannot organise clutter, so decluttering needs to happen first. Many people assume that organising is the biggest part of the process, but in reality, it is often the decluttering stage that takes the most time.
While different professional organisers may use slightly different approaches, the general process is usually quite similar. The first step is identifying what you want to keep, what can be donated, and what is no longer needed.
At Being Well Organised, I work alongside clients throughout the decluttering process. I do not make decisions for you, and I never tell you what you must get rid of. All decisions remain yours. My role is to guide, support and help you work through the decision-making process in a practical and non-judgemental way.
Over the years, I have developed different questions that can help clients make decisions about their belongings. These questions encourage reflection and often make it easier to determine whether an item is still useful, meaningful or serving a purpose in your life.
During a decluttering session, we may:
Sort and categorise belongings
Identify items to keep, donate, recycle or discard
Discuss your goals and priorities for the space
Reduce visual clutter and overwhelm
Create clearer, more functional spaces
Once the decluttering is complete, we can look at what remains and create practical organising systems. Organising becomes much easier when you are only working with the items you genuinely use, need and love.
The amount of time required will vary from person to person. Some people make decisions quickly, while others need more time to consider their options. Neither approach is right or wrong. A good decluttering process moves at a pace that feels comfortable and manageable for the client.
One aspect of my service that many clients appreciate is that I can remove suitable donation items at the end of each session. This saves clients the time and effort of transporting donations themselves and helps create an immediate sense of progress and relief.
Importantly, I never remove any item without a client's knowledge and permission. Before donation items leave the home, I will often ask clients to do a final check. Once an item has been donated, it is usually no longer recoverable, so it is important that clients feel comfortable and confident with their decisions.
People seek decluttering support for many different reasons. Some are feeling overwhelmed by clutter and do not know where to start. Others are short on time, preparing for a move, managing a busy household, navigating a life transition or simply wanting a home that feels calmer and easier to maintain.
Professional decluttering is not about creating a picture-perfect home. It is about creating a home that functions well for the people who live there.
Whether you need help with a single wardrobe, an overflowing pantry, a cluttered spare room or an entire home, the goal is always the same - to create practical systems that make everyday life easier.
If you are wondering whether decluttering support could help in your situation, consider giving me a call. We can discuss your goals, answer any questions and explore the most effective way to move forward.
Less Mess. More Peace.
Many people use the terms decluttering and organising interchangeably, but they are actually two different processes.
Understanding the difference can help you set realistic expectations and make it easier to know what type of support you need.
In simple terms:
Decluttering is deciding what stays and what goes.
Organising is deciding where the remaining items should live.
Decluttering comes first.
One of the most common misconceptions is that a professional organiser will immediately begin placing items into containers, rearranging cupboards or creating storage systems. In reality, most organising projects begin with decluttering.
As many professional organisers say, “you cannot organise clutter.”
If cupboards, wardrobes, drawers and shelves are already full, adding more storage solutions is unlikely to solve the problem. You cannot make spaces that are overfilled look neater simply by rearranging!
Before a space can be organised effectively, it is important to reduce the volume of items and determine what is genuinely needed, used and valued.
Decluttering involves making decisions about your belongings. This may include identifying items to keep, donate, recycle or discard. For some people, these decisions come easily. For others, the process can feel overwhelming, emotional or time-consuming.
At Being Well Organised, I work alongside clients throughout the decluttering process. I never tell clients what they should get rid of and I never remove anything without permission. All decisions remain with the client. I will, however, help clients make these decisions, sometimes by asking questions they have not thought of, other times by being a sounding board or guiding them towards a solution.
Once the decluttering process is complete, organising becomes much easier.
Organising focuses on creating practical systems for the items that remain. The goal is to create spaces that are functional, easy to maintain and suited to the way you and your household live.
Organising may involve:
Grouping similar items together
Creating logical homes for belongings
Improving the layout of cupboards, wardrobes and storage areas
Making frequently used items easier to access
Establishing simple systems and routines that are easier to maintain
The amount of time spent decluttering versus organising varies from project to project. Many clients are surprised to discover that once the decluttering is complete, the organising often falls into place quite naturally. With fewer items to manage, spaces become easier to use, maintain and enjoy.
Both decluttering and organising play an important role in creating a calmer and more functional home.
While organising creates the structure, decluttering creates the space needed for that structure to work.
Whether you need help tackling a single wardrobe, an overflowing pantry, a cluttered spare room or an entire home, the process usually begins the same way: declutter first, then organise.
If you are unsure where to start, consider giving me a call. We can discuss your goals, answer any questions and explore the most effective way to move forward.
Less Mess. More Peace.
People often wonder whether hiring a professional organiser is a luxury or something that is genuinely achievable within their budget.
The cost of professional organising services in Melbourne varies depending on the size of the project, the amount of clutter involved, and the level of support required. Some people may simply want help organising a single wardrobe or pantry, while others require assistance decluttering an entire home.
As with many services, professional organising costs can vary considerably. Different organisers offer different levels of support, experience and pricing structures. The best option is to find an organiser you feel is approachable, you feel comfortable with, and whose service matches your needs, goals and budget.
A professional organiser can help you:
Sort and categorise belongings
Decide what to keep, donate or discard
Create practical and personalised storage solutions
Reduce overwhelm and decision fatigue
Develop routines that are easier to maintain
When considering cost, it can be helpful to think about the value of your own time, stress reduction and the long-term benefits of living in a less cluttered and more organised home. You may also want to think about the cost of not seeking help. Delaying a project can sometimes lead to ongoing frustration, wasted time and increased stress.
Prices of Being Well Organised services are clearly listed on my website, allowing you to understand the costs involved and decide whether professional organising is the right fit for your circumstances. Many clients find that the benefits extend well beyond an organised and tidy home, helping to reduce stress and make everyday life easier.
Or as I like to say: Less Mess. More Peace.
If you are unsure how much support you need, consider giving me a call. We can discuss your goals, answer any questions and explore the most effective way to move forward.
Many people consider hiring a professional organiser but hesitate because they wonder: "Shouldn't I be able to do this myself?"
It is a very common question. Most people know they need to declutter, organise or create better systems in their home. The challenge is often finding the time, energy and motivation to actually make it happen.
Then there is the doubt: "How do I even start?"
Life gets busy, and increasing everyday demands can mean organising projects are continually pushed further down the list.
A professional organiser is not there because you are incapable of organising your own home. Many people who seek support are perfectly capable of sorting through their belongings — they simply need guidance, accountability and an experienced person alongside them to help move the process forward.
So why do people hire a professional organiser?
There are many different reasons. Some people feel overwhelmed and do not know where to begin. Others have tried to tackle a space themselves but become stuck, lose momentum or never quite get the project finished.
A professional organiser can provide:
A clear plan and starting point
Support with decision-making
Accountability and encouragement
An objective perspective
Practical ideas and solutions
Help creating systems that are easier to maintain
Sometimes the biggest benefit is simply having someone there to ask the right questions and keep the process moving.
Knowing where to start — and continuing until the job is finished — can often be the hardest part.
And then that quiet voice whispers (or perhaps a loud voice screams!): "But shouldn't I just do it myself?"
For some people, DIY decluttering and organising works perfectly. However, many others find that having professional support helps them achieve their goals more efficiently and with less stress.
Think of it like other areas of life. Most of us are capable of learning how to complete certain tasks ourselves, but we often choose to hire professionals because we value their experience, knowledge and the time they save us.
We use mechanics to service our cars, accountants to help with tax, tradespeople for home repairs and tutors to help us study.
Decluttering and organising is no different.
The value is not that you cannot do it yourself. The value is having someone with experience help you achieve your goal in a practical and supportive way.
What are the benefits of hiring a professional organiser?
Creating an organised home is not just about having tidy cupboards or beautifully arranged spaces. The real benefit comes from creating a home that functions better for you and your household.
Being Well Organised is not about perfection.
It is about creating practical systems that make everyday life easier.
Clients often find that an organised home can help:
Reduce daily stress and frustration
Make routines easier
Save time looking for misplaced items
Make better use of existing storage
Avoid purchasing duplicate items
Create spaces that are easier to maintain
Make everyday life feel calmer
The benefits will be different for everyone. For some people, it may mean finally being able to use a room that has become a dumping ground. For others, it may mean creating systems that make busy mornings easier or a home that feels more peaceful at the end of the day.
Is a professional organiser worth the investment?
The answer depends on your circumstances, goals and priorities.
For some people, investing in professional organising support provides the motivation and structure they need to complete a project they have been putting off for months or even years.
The value is often found not just in the finished space, but in the time saved, reduced frustration and confidence that comes from having systems that work for you.
Many clients find that the benefits extend beyond the physical transformation. Creating a home that feels calmer, more functional and easier to manage can have a positive impact on everyday life.
How do you know if professional organising support is right for you?
Professional organising may be helpful if:
You feel overwhelmed and do not know where to begin
You have been meaning to tackle a space but keep putting it off
You have tried before but struggled to finish
You want guidance without judgement
You are going through a life transition such as moving, downsizing or changing family circumstances
You want to create systems that are practical and easier to maintain
Hiring a professional organiser is a personal choice. Some people enjoy tackling projects independently, while others find that having experienced support makes the process easier, faster and less overwhelming.
At Being Well Organised, my approach is always practical, supportive and tailored to each client's individual circumstances. The goal is not perfection - it is to create spaces and systems that make everyday life easier.
Consider giving me a call. We can discuss your goals, answer any questions and explore the most effective way to move forward.
Less Mess. More Peace.
Want help putting these tips into action?
Let’s start Being Well Organised together.